How to Export Parsed Invoices Straight Into Xero
Upload an invoice, review the extracted data, export a Xero-ready CSV, and import it as draft bills. The exact column headers, the AccountCode and TaxType gaps, and the real Xero import steps.
RevExOS
Q2C Consulting
If you run your books in Xero and receive vendor invoices as PDFs or scanned images, you already know the two options: type each one into Xero by hand, or find a way to get the data out of the document automatically and into a format Xero will actually accept. Xero is stricter about CSV import than most accounting software, which is exactly where most homemade extraction workflows fall apart.
The Invoice Parser reads the invoice with GPT-4o vision, hands you an editable review screen for the header fields and line items, and then exports a CSV built to match Xero's own bulk-import column headers - including the asterisk-prefixed required fields Xero's importer specifically checks for. Here's the full walkthrough, and the two gaps in that export you need to fill in yourself before Xero will accept it.
Step 1: Upload the Invoice
Go to /invoice-parser and drop in a PDF, PNG, JPEG, or WEBP file - up to 10MB, up to 5 pages. There's no account and no signup gate for the first two parses of the day. The file is processed in memory during extraction and is never written to disk or saved on RevExOS's servers - nothing about the invoice or its contents persists anywhere on our side once you close the tab.
Step 2: Review the Extracted Data
The tool pulls out header fields (invoice number, PO number, invoice date, due date, vendor name and address, customer name and address, currency, payment terms, subtotal, tax, total) and line items (description, quantity, unit price, amount, SKU) into an editable screen. Nothing goes into your export batch until you've had a chance to fix it.
This matters more for a Xero export than for most, because Xero's importer treats several fields as required and will reject rows that are missing them. A clean, typed vendor invoice extracts close to perfectly. A photographed receipt, a handwritten adjustment, or an invoice with an unusual layout is where the model is more likely to miss something - check the contact name, the invoice date, and the quantity/amount fields on each line item before moving on. Click Add to Export Batch when it looks right, and repeat for as many invoices as you want to include in one export - the tool batches multiple parsed invoices together so you're not exporting and importing one at a time.
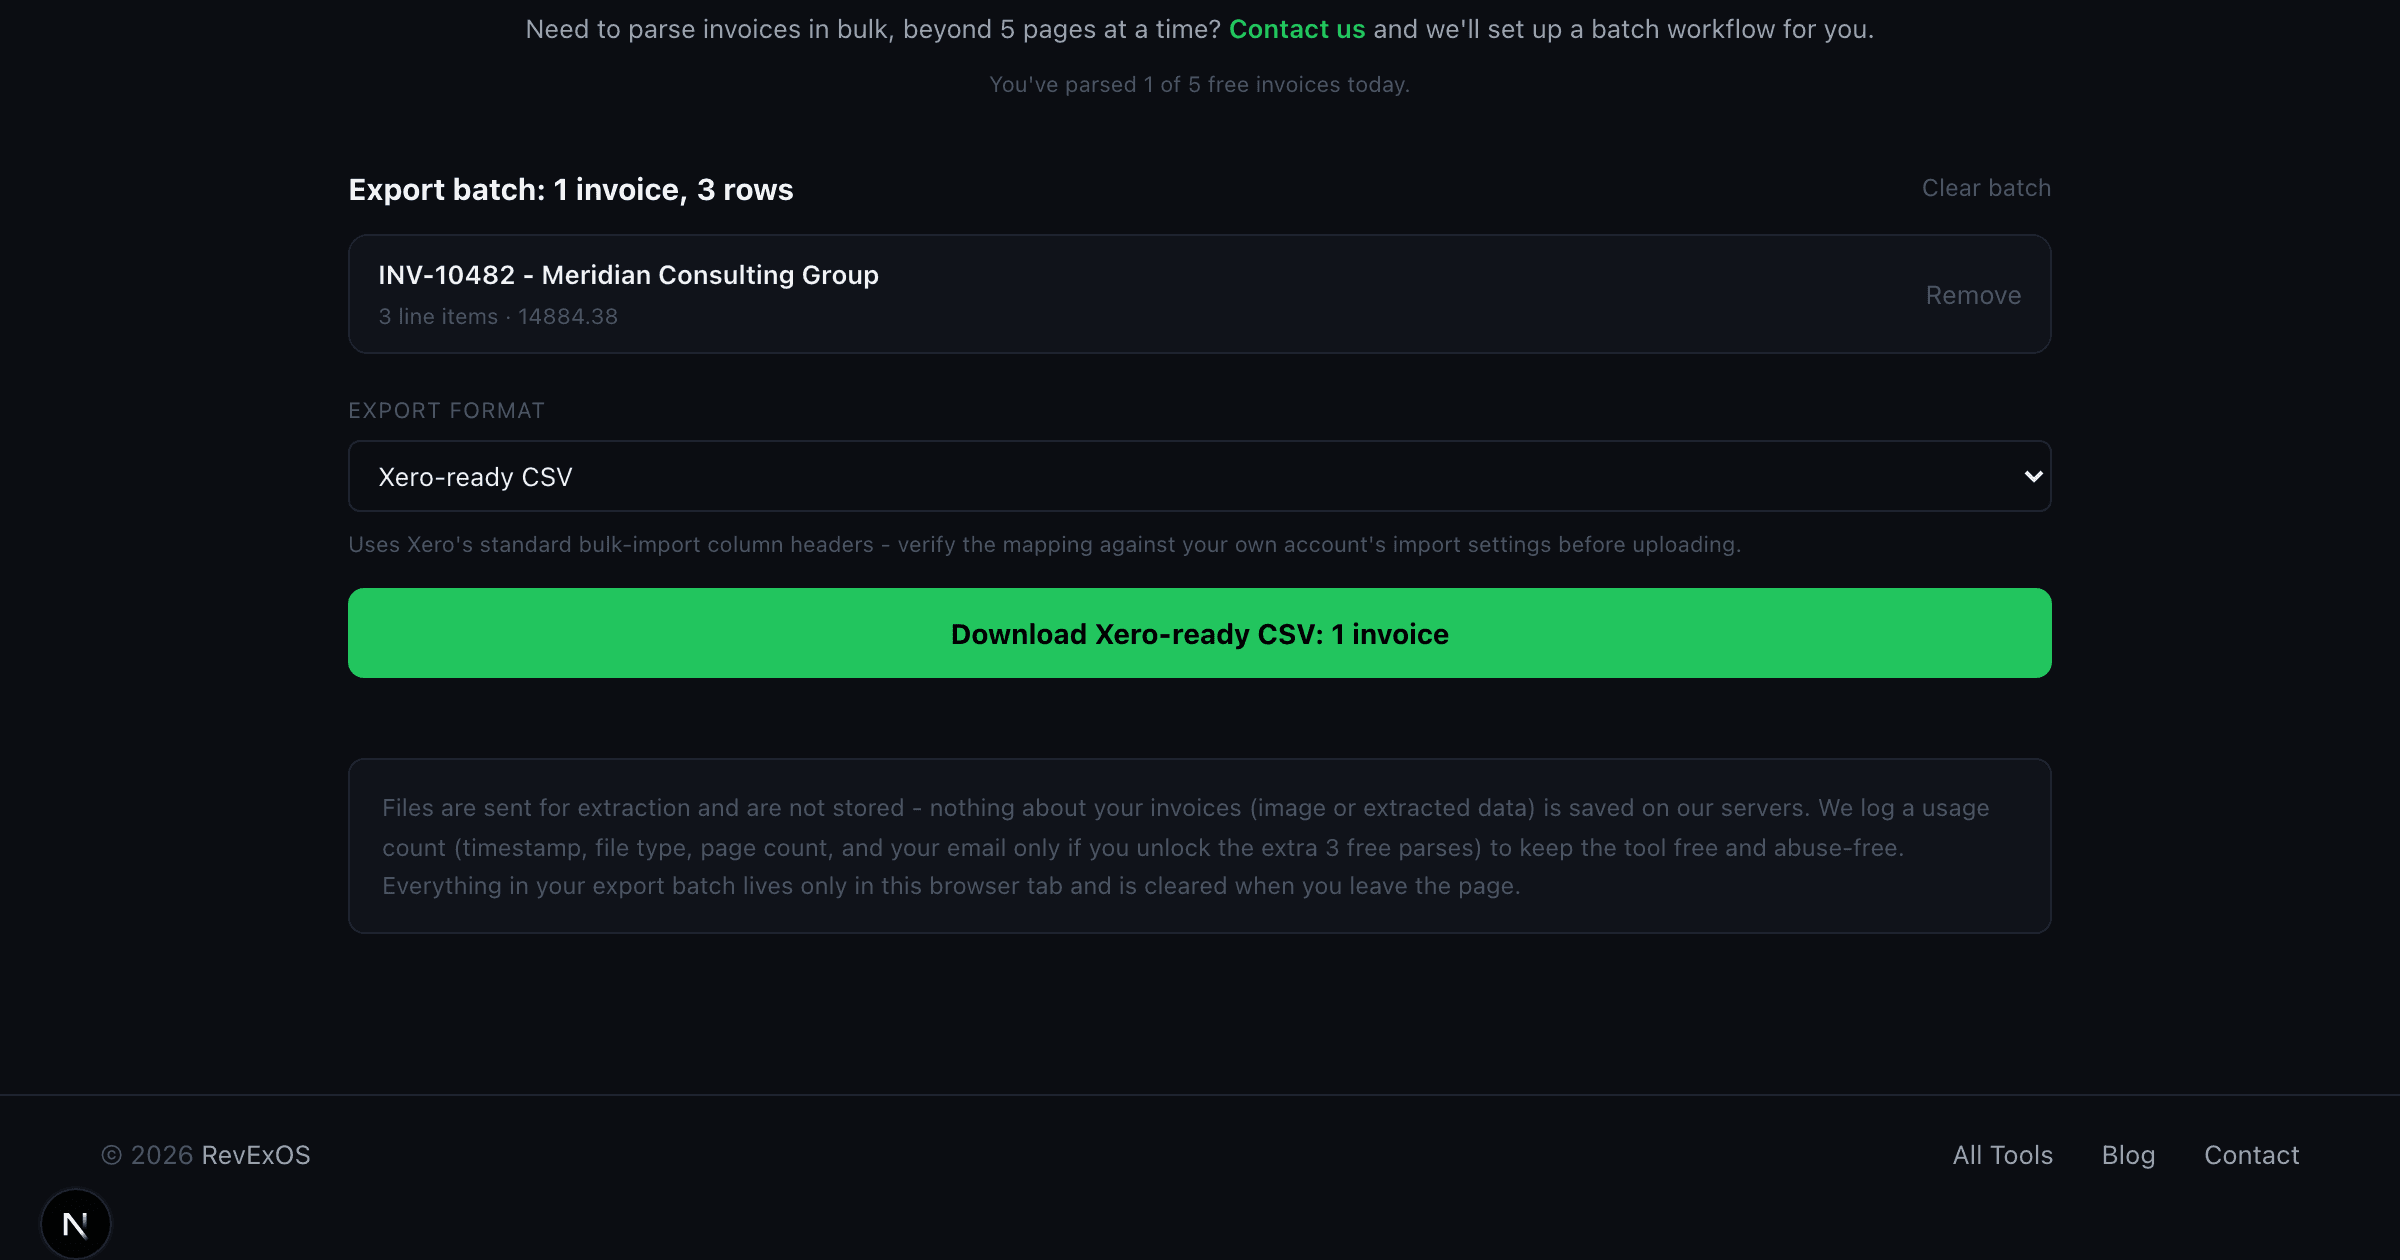
Step 3: Choose "Xero-ready CSV"
In the export format dropdown, select Xero-ready CSV. This produces a file matching Xero's bulk-import template column-for-column:
| Column | Source | Notes |
| *ContactName | Vendor or customer name | Required by Xero |
| *InvoiceNumber | Invoice # | Required by Xero |
| *InvoiceDate | Invoice date | Required by Xero |
| *DueDate | Due date | Required by Xero |
| Description | Line item description | |
| *Quantity | Line item quantity | Required by Xero |
| *UnitAmount | Line item unit price | Required by Xero |
| AccountCode | - | Left blank, see below |
| Currency | Currency |
The asterisk-prefixed columns are Xero's own convention for fields it will not import a row without. The exported CSV includes all of them, populated from what was extracted and reviewed on the previous screen.
The AccountCode gap. AccountCode maps a line item to a specific account in your chart of accounts - something like 400 for advertising or 453 for office supplies. Every business's chart of accounts is different, and the parser has no way to know which account a given expense belongs to. The column is included in the export but left blank on purpose. You'll need to fill it in, either in the CSV before uploading or in Xero's UI after import, before the bill is fully coded.
The TaxType gap. Xero's own official CSV template includes a TaxType column that this export does not populate, since tax treatment (tax-exclusive, tax-inclusive, tax-exempt, and the specific rate) is also account and jurisdiction-specific. If your invoices carry tax, either add a TaxType column with the correct values before uploading, or plan to set the tax treatment on each item inside Xero after import.
Step 4: Import Into Xero
With the CSV downloaded, the import happens inside Xero itself:
- Go to the Business menu, then Bills to pay (for vendor invoices you owe) - or Sales > Invoices if these are invoices you're issuing to customers.
- Click New bill (or New invoice), then look for the Import from CSV option in that screen.
- Upload the file. Xero checks the column headers against its own template - it needs the exact header names, so don't rename any columns even if you'd prefer different labels. If a required asterisk column is missing or misnamed, Xero rejects the file before it even gets to the row-by-row check.
- Save your file as CSV, specifically UTF-8 encoded, not as an XLSX. Xero's importer rejects Excel files outright - this export always produces a plain CSV, so this step is already handled for you, but it matters if you open and re-save the file in Excel before uploading.
- On upload, Xero asks whether the amounts in your file are tax-inclusive or tax-exclusive. Answer based on how the AccountCode/TaxType situation above nets out for your invoices, then confirm.
- Review what Xero shows you before finalizing the import.
Imported items land as drafts, not posted invoices. This is the detail people miss most often. A successful CSV import in Xero does not create finalized bills or invoices - it creates drafts sitting in your Draft queue. Someone still needs to open each one, confirm the coding is right, and approve it before it affects your books or your AR/AP aging. Budget time for that review step; it is not optional and it does not happen automatically no matter how clean the import was.
If you're importing more than 500 items, split the file. Xero's own guidance recommends breaking large imports into batches of 500 rows or fewer. Since this export produces one row per line item (not one row per invoice), a batch of 30 multi-line vendor invoices can easily cross that threshold - check your row count before uploading a large batch.
Where People Get Tripped Up
Renaming the header row. Xero matches columns by exact header name, not by position. If you open the CSV in Excel to fix something and Excel or an autocorrect changes "*ContactName" to "*Contactname" or strips the asterisk, the import will fail or silently skip that field. Edit the CSV in a plain text editor if you need to touch it before uploading.
Contact name mismatches. Just like QuickBooks, Xero matches contacts by name. If the extracted vendor name is "Acme Corp" and your existing Xero contact is "Acme Corporation," you'll get a new, duplicate contact record instead of a bill attached to the one you already have. Check the ContactName column against your existing Xero contacts before importing, especially for recurring vendors.
Forgetting the drafts need approval. Teams sometimes assume a completed import means the bills are live. They're not. If your AP aging or cash forecast looks wrong right after an import, check the Draft queue first - the bills are probably sitting there unapproved.
Tax treatment applied incorrectly. Because AccountCode and TaxType are both blank or generic on export, it's easy to approve a batch of drafts without actually setting tax treatment correctly on each one. For invoices with meaningful tax amounts, this is worth a second pass before you approve, not after.
When This Makes Sense vs. When It Doesn't
This is built for the volume between "I'll just type it in" and "I need a dedicated AP platform" - a handful of vendor bills a week, catching up on a backlog, or an occasional bulk batch you don't want to hand-key. If you're running hundreds of bills a month with multi-step approval routing and three-way matching against purchase orders, Xero's CSV importer (and the manual draft-approval step it requires) becomes the bottleneck regardless of how good the extraction is - that's a case for a dedicated AP automation setup rather than a CSV round-trip.
If you're the one issuing invoices rather than receiving them, the Invoice Generator builds the PDF you send to a client, and the Quote Generator and Proposal Generator cover the steps before that in the sales cycle.
Try it yourself: Invoice Parser. Two free parses a day, no signup, five a day once you share an email.
Frequently Asked Questions
- Why does the exported CSV leave AccountCode blank?
- AccountCode maps to your specific chart of accounts, which the tool has no access to. You need to fill it in before uploading or code each item manually in Xero after import.
- Do invoices import directly into my Xero books?
- No. Xero imports bills and invoices as drafts - someone still needs to open and approve each one before it affects your AR/AP aging.
- What file format does Xero require?
- CSV saved as UTF-8 specifically. Xero rejects XLSX/XLS files outright.